
7 Most Common Dyeing Defects in Textile Mills — Causes, Fixes & How to Prevent Them
- Dhruv Garg
- May 6
- 11 min read
There is no sound more expensive in a textile mill than a QC manager saying: "This batch is rejected."
A single dyeing defect — caught too late — wastes thousands of dollars in water, chemicals, energy, and labour. It delays shipments. It destroys your Right-First-Time (RFT) percentage. And in today's global supply chain, where buyers in Italy, Bangladesh, Vietnam, and Turkey are monitoring quality metrics in real time, a pattern of dyeing defects means lost contracts.
After 40 years of manufacturing and supplying reactive dyes, acid dyes, and direct dyes to textile mills across 20+ countries, the technical team at Avi Chemicals has seen every dyeing defect — and helped dye houses fix them. This guide covers the 7 most common dyeing defects we encounter in production consultations, their root causes, and the practical remedies that actually work.
Whether you are dyeing cotton with reactive dyes in Dhaka, processing nylon with acid dyes in Ho Chi Minh City, or running cellulosic fabric through a jigger in Istanbul — this guide applies to your production floor.
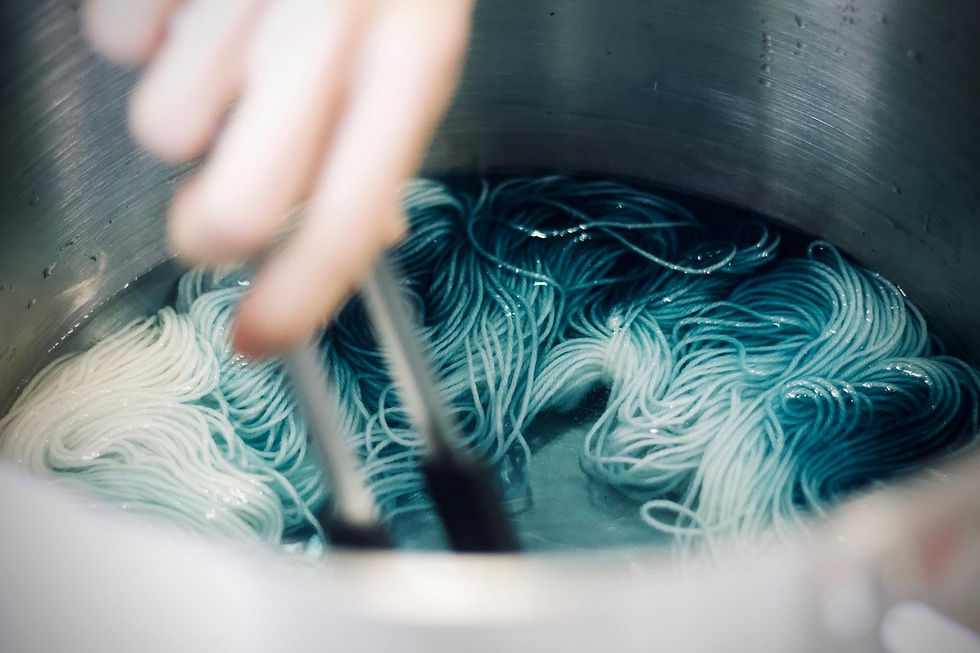
Defect 1: Uneven Dyeing (Unlevel Shade)
What It Looks Like
The dyed fabric shows patches, streaks, or side-to-centre shade differences. The colour is not uniform across the fabric width or length.

Why It Happens
Uneven dyeing is almost always a strike management problem. When the dye exhausts onto the fibre too quickly — before the fabric is evenly wetted and circulating — you get irreversible patches that no amount of levelling agent can fix after the fact.
The most common specific causes:
Salt added too fast in reactive dyeing: A sudden increase in ionic strength drives rapid dye exhaustion onto unevenly pre-wetted fabric. The dye bonds immediately, leaving no opportunity for redistribution.
Temperature ramp too steep: Dye molecules migrate fastest in the early stages of heating. If temperature rises too quickly, strike happens unevenly — hotter zones exhaust faster.
Poor fabric preparation: Residual size, uneven bleaching, or non-uniform pre-wetting means different sections of the fabric have different dye affinity. The dye cannot overcome what preparation did not fix.
Machine loading problems: Tight rope tensions, foaming in the bath, or inadequate liquor circulation all create zones of restricted dye access.
Water hardness: Calcium and magnesium ions in hard water compete with the dye for fibre surface sites, leading to uneven uptake — particularly in exhaust dyeing of cotton.
The Fix
During dyeing: Slow down the salt addition rate. Use a graduated dosing curve — add 30% of the total salt in the first addition, then 40%, then 30% — with 15-minute intervals between additions. This controls the rate of dye exhaustion and gives the dye time to level.
Temperature: Never exceed a heating rate of 1–2°C per minute during the critical strike phase. On jet and overflow dyeing machines, monitor the rate electronically.
Prevention: Always start with a thorough pre-wetting step (minimum 15 minutes at 60°C with a good wetting agent). Check water hardness with a test kit before every production batch — anything above 50 ppm hardness requires softening. Work with your dyestuff supplier to select dyes with high migration and levelling properties for difficult fabrics.
Defect 2: Batch-to-Batch Shade Variation
What It Looks Like
The same colour specification produces visibly different shades across different production batches or different dyeing machines. Your buyer sends a complaint — or worse, a chargeback — because the garment panels from two different lots don't match.

Why It Happens
Batch-to-batch shade variation is one of the most commercially damaging defects in textile dyeing because it is often not caught until cutting or garmenting — after the fabric has already been processed. The causes are numerous and interact with each other:
Dye lot strength variation: Even from a consistent supplier, dye powder strength can vary ±2–5% batch to batch. Without proper dye strength testing, a "correct" recipe by weight is not actually a correct recipe by dye content.
Water quality changes: Municipal water hardness varies seasonally. Hard water dulls shades and reduces colour strength. If your water hardness changes between batches, your shade changes.
Inconsistent pre-treatment: Non-uniform mercerisation or bleaching changes the fibre's affinity for dye. Two rolls of fabric from different grey lots dye differently even with identical recipes.
Process parameter drift: Small variations in pH, temperature, salt concentration, or fixation alkali dosing compound across multiple batches to produce visible shade differences. A pH variation of just 0.3 units in the alkali phase of reactive dyeing can shift a navy to a noticeably different hue.
Liquor ratio variation: If machines are loaded inconsistently, the effective dye concentration in the bath changes — producing deeper or paler shades than intended.
The Fix
The solution to batch-to-batch variation is standardisation and measurement, not hope.
Test every dye lot for strength before it enters production. Request a Certificate of Analysis (CoA) from your dyestuff supplier confirming dye strength within a defined tolerance (±2% is industry standard). At Avi Chemicals, every batch is tested before dispatch.
Install water softening if hardness is variable. Consistent water quality is non-negotiable for reproducible shade results.
Use a spectrophotometer for all lab dip approvals. Visual colour matching between lab dip and standard is not reliable across different observers, light sources, or fabric textures.
Document every parameter for every batch: pH at fixation stage, temperature profile, salt addition rate, bath ratio. When a shade variation occurs, you need data to isolate the cause.
Defect 3: Poor Wash Fastness
What It Looks Like
The dyed fabric bleeds or fades significantly during washing. The colour stains adjacent white or light-coloured fabric in multi-component garments. Buyers using ISO 105-C06 wash fastness testing reject the fabric for failing Grade 4 minimum.
Why It Happens
Poor wash fastness in reactive-dyed cotton is almost always caused by inadequate fixation or inadequate washing-off of unfixed dye.
Reactive dyes work by forming a covalent bond with the cellulose molecule. When that bond forms properly, the dye is locked into the fibre and wash fastness is excellent. When fixation is incomplete — due to wrong pH, wrong temperature, wrong alkali concentration, or insufficient fixation time — a portion of the dye remains unfixed in the fibre. This hydrolysed, unfixed dye bleeds freely during washing.
Specific causes:
Insufficient alkali (soda ash) concentration: Under-dosing of sodium carbonate during the fixation phase means the cellulose OH groups are not activated to react with the dye. Less covalent bonding = more unfixed dye.
Inadequate washing-off: After fixation, unfixed hydrolysed dye must be completely removed by hot washing and soaping. Skipping or shortening the wash-off sequence to save time is the single most common cause of wash fastness failures in bulk production.
Using incompatible dye combinations: In trichromatic (three-dye) combinations, dyes of very different fixation efficiencies wash off at different rates. Select dyes of similar fixation efficiency for each component of a combination shade.
Water quality during wash-off: Calcium and magnesium in hard wash water can re-deposit unfixed dye onto the fabric surface during rinsing.
The Fix
Never compromise on the wash-off sequence. After reactive dyeing, the standard protocol should be:
Cold rinse × 2
Hot rinse at 60°C × 1
Hot soap treatment at 95°C for 15–20 minutes (with a non-ionic soaping agent)
Hot rinse at 60°C × 1
Cold rinse × 1
Neutralisation if required
This sequence cannot be shortened. The hot soaping step at 95°C is the critical stage that removes hydrolysed dye from the fibre surface. Mills that skip or shorten this step to save water and energy pay for it with wash fastness failures and buyer chargebacks.
For deep shades (navy, black, dark red), increase the soaping step to 20–25 minutes. Dark shades have higher dye concentrations and proportionally more unfixed dye that must be removed.
Defect 4: Shade Fading During Finishing (Thermomigration)
What It Looks Like
The shade produced after dyeing is correct, but after drying or heat-setting, the colour has shifted — often becoming duller, greener, or redder than the original dyed shade. The problem is especially common with dark shades and with fabrics that go through a stenter or curing oven.
Why It Happens
This defect — often called thermomigration — occurs when heat-sensitive components in a dye molecule or finishing formulation cause molecular rearrangement at high temperatures. In reactive dyes on cotton, the most common cause is over-drying or excessive stenter temperatures (above 160°C for extended dwell times).
Additionally:
Softeners and finishing chemicals applied after dyeing can react with certain dye structures under heat, causing shade shifts. Some cationic softeners are notorious for shifting navy and black shades towards a red or brown hue.
pH of the finished fabric: An alkaline fabric pH (residual soda ash) accelerates dye decomposition under heat. The fabric must be neutralised to a slightly acidic pH (5.5–6.5) before entering the stenter.
The Fix
Always neutralise dyed fabric before finishing. A mild acid rinse (acetic acid, 0.5–1 g/L) at the final rinse stage brings the fabric to a pH of 5.5–6.0, stabilising the dye molecule under heat.
Test your softener system against your dye combination before production. Apply the full finishing sequence to a lab sample and evaluate shade change under your actual stenter conditions.
Keep stenter temperatures to the minimum necessary for the desired handle — typically 140–150°C for 30–45 seconds is sufficient for most cotton applications.
Defect 5: Lab-to-Bulk Shade Mismatch
What It Looks Like
The approved lab dip matches the buyer's standard perfectly. But the bulk production shade is noticeably different — paler, darker, or hue-shifted — even though the same recipe, dyes, and process were used.
Why It Happens
Lab-to-bulk shade mismatch is one of the most commercially disruptive defects because the buyer has already approved the sample. Explaining to a buyer why their approved shade was not reproduced in bulk production destroys confidence immediately.
The core reasons:
Scale-up effects: Laboratory dyeing uses different liquor ratios, heating profiles, and agitation levels than bulk machines. A recipe that works perfectly on 50g in a laboratory beaker behaves differently in a 500kg jet dyeing machine.
Dye strength inconsistency between lab and production dye stock: Lab dye stock and production drum dye may be from different batches with different dye strengths. Both are weighed "correctly" by weight — but are not equivalent in colour yield.
Different fabric construction: Lab samples are often cut from a different roll than the bulk production fabric. If greige quality, preparation quality, or fibre characteristics differ between rolls, the shade will differ.
The Fix
The most effective solution is to trial dye a production-scale sample before approving the lab dip. Use a 2–5 kg trial run on the actual production machine, with the actual production batch of fabric and dyes, before signing off on the shade approval. This adds one step to the process but eliminates bulk rejections almost entirely.
Additionally, always cross-check dye strength between lab stock and production stock when changing dye batches. Request a CoA for every new batch and adjust recipe quantities by the strength factor.
Defect 6: Surface Fading and Poor Rub Fastness (Leather and Nylon)
What It Looks Like
In leather goods and nylon fabric, dyed surfaces show visible colour transfer when rubbed against white fabric or skin. In leather, rub fastness failures cause staining of garment linings, upholstery, and adjacent surfaces. In nylon sportswear, wet rub fastness failures cause staining of skin during perspiration.

Why It Happens
Rub fastness failures in acid dyes on leather and nylon are primarily caused by:
Insufficient penetration of the dye into the substrate: Dye that remains on the fibre or leather grain surface rather than penetrating into the structure is vulnerable to surface abrasion.
Overdosing of dye: Applying more dye than the substrate can fix leaves excess dye on the surface. More is not more — it is worse fastness.
Insufficient fixing treatment: Acid dyes on leather and nylon benefit from a post-dyeing fixing treatment (with a fixative agent) that locks the dye structure in place. Skipping this step dramatically reduces rub fastness.
Incorrect pH at fixing stage: Acid dyes fix best at pH 3.5–5. If the bath pH is too high at the end of the dyeing cycle, dye fixation is incomplete.
The Fix
For leather dyeing: Apply dye in multiple thin additions rather than one heavy dose. Give each addition time to penetrate before the next. After dyeing, apply a penetration step — reduced temperature and increased agitation — to drive surface dye into the grain layer.
Always finish with a dedicated leather fixing agent (cationic fixative) at the final step. This forms a secondary bond with the dye molecule, significantly improving both wet and dry rub fastness.
For nylon: Use metal-complex (1:2) acid dyes for applications where superior rub and light fastness are required. Their larger, more complex molecule structure produces outstanding fastness compared to levelling acid dyes.
Defect 7: Low Colour Yield / Pale Shade in Bulk
What It Looks Like
The final dyed shade in bulk production is noticeably paler than the approved standard, even though the recipe appears correct. Increasing the dye concentration does not consistently solve the problem.
Why It Happens
Low colour yield wastes dye, wastes chemical auxiliaries, requires re-dyeing, and burns time and energy. Its causes are frequently overlooked because they are not always obvious:
Inadequate fabric preparation: Residual size, wax, or oil on the fabric surface physically blocks dye penetration. Yellowed fabric (from insufficient bleaching) absorbs less dye and produces dull, pale shades. Scouring and bleaching quality directly determines your maximum achievable colour depth.
High water hardness: Hardness ions (Ca²⁺, Mg²⁺) complex with dye molecules in the bath, reducing the amount of free dye available to exhaust onto the fibre. A water hardness of 200 ppm can reduce effective dye yield by 15–20%.
Incorrect liquor ratio: A higher-than-specified liquor ratio (e.g. running at 1:15 when the recipe is designed for 1:10) dilutes the dye concentration and reduces exhaustion.
Dye hydrolysis: In reactive dyeing, if the soda ash is added too early — before the dye has fully exhausted onto the fibre — the alkali activates the dye in the bath rather than on the fibre. The dye hydrolyses with water instead of bonding with cellulose. Hydrolysed dye cannot fix — it washes off completely.
The Fix
The fastest way to diagnose low colour yield is to run a controlled test: dye a laboratory sample under identical conditions to the bulk batch, measuring pH at each stage and testing dye bath exhaustion before and after alkali addition. This isolates whether the problem is fabric preparation, water quality, or process sequence.
For production: standardise your liquor ratio on every machine and check it before loading. Install a water softener and track water hardness daily. And never add soda ash until the dye has been exhausted for a minimum of 20–30 minutes after salt addition — confirming that maximum exhaust has occurred before fixing.

The One Factor Beneath All Seven Defects: Dye Quality
Reading through the seven defects above, a pattern becomes clear: many of them — poor wash fastness, shade variation, low colour yield, uneven dyeing — are aggravated or caused by inconsistent dye quality. When dye strength varies from batch to batch. When reactive group content is lower than declared. When solubility is inconsistent, causing precipitation in the bath.
A dye supplier's CoA is not just paperwork. It is a quality guarantee. And in a world where a single batch rejection can cost more than six months of dye procurement savings, choosing a supplier purely on price per kilogram is a false economy.
At Avi Chemicals, our in-house QC laboratory tests every single production batch for shade strength, solubility, compatibility, and fastness performance before dispatch. Every batch shipped carries a Certificate of Analysis. And our technical team is available to consult on production issues — not just supply the product and disappear.
Because after 40 years of watching dye house managers troubleshoot problems on the production floor, we know that the best dyestuff is one that removes the need to troubleshoot in the first place.
Quick Reference: 7 Dyeing Defects Summary Table
Defect | Primary Cause | Priority Fix |
Uneven dyeing | Too-fast salt addition, poor pre-wetting | Graduated salt dosing, soften water |
Batch-to-batch shade variation | Dye strength variation, water hardness changes | Test every dye lot with CoA, standardise water |
Poor wash fastness | Incomplete fixation, shortened wash-off | Full hot soaping sequence at 95°C |
Shade shift after finishing | High stenter temp, residual alkali, softener reaction | Neutralise to pH 5.5–6.0 before stenter |
Lab-to-bulk mismatch | Scale-up effects, dye batch differences | Trial run on production machine |
Poor rub fastness (leather/nylon) | Surface dye, insufficient fixing treatment | Cationic fixative, metal-complex dyes |
Low colour yield | Poor preparation, water hardness, early alkali addition | Scour + bleach thoroughly, delay soda ash addition |
Need Technical Support or a Dye Sample?
If you are experiencing any of the defects described in this guide — or if you want to switch to a dyestuff supplier that backs every batch with consistent quality and technical expertise — get in touch with Avi Chemicals.
Our team will review your current dyeing recipe, recommend the right dye class and series for your application, and provide lab dips for shade development. We respond to all enquiries within 24 hours.
📞 +91 88660 13200 | +91 88660 16200
📍 C-1/341, Phase - II, G.I.D.C., Vatva, Ahmedabad, Gujarat - 382445


Nice knowledgeable blog
Nice detailed content.. worth the read
Good content..
Very informative
Nice read